Getting more out of Google Analytics: Advanced Custom Filters
Ben Travis, Former Marketing Manager
Article Categories:
Posted on
Filters are a great way to get more out of your Google Analytics (GA) data, and knowing how to use Advanced Custom Filters lets you take advantage of one of GA’s most powerful tools. Unfortunately, documentation around this feature is sparse and confusing, so in this post I’ll attempt to demystify the world of Advanced Custom Filters.
First, let’s talk about why you’d generally use filters: Filters allow you to limit and modify the traffic data included in a view. Advanced Custom Filters are filters that can rewrite and rename data in a field based on the data in one or two other fields. If you’re wondering when you might use this particular type of filter, here are some examples:
- Adding a hostname to a request URI* to view a full URL
- Removing trailing slashes from pages
- Aggregating similar browser versions
- Renaming events (e.g. adding request URI to event)
- Changing page titles
- Eliminating query parameters
*The request URI is the relative URL, or the part of the URL after a hostname. If we look at the URL “https://viget.com/work”, for example, the request URI is “/work”.
Now that you’re convinced that you need an Advanced Custom Filter, let’s look at the different options presented by GA. In order to add a filter, we’ll need to navigate to Admin > Filters > New Filter, and turn on the Custom filter toggle.
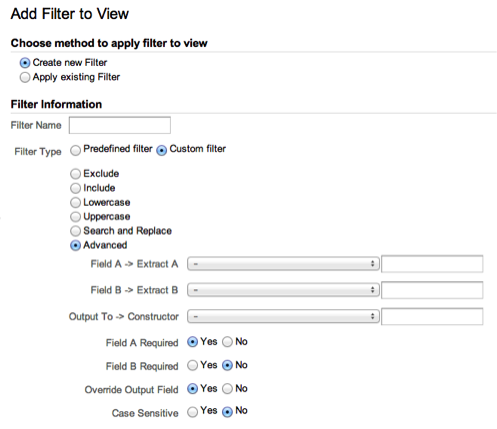
The name field should be self-evident, but the next three empty fields may cause some confusion, so let’s go step-by-step.

GA allows you to use all or part of Field A and/or all or part of Field B to create a new output. We’ll use Regular Expressions to specify which parts of Field A and B to use, so if you’re a bit rusty on Regular Expressions, you may want to freshen up. Parentheses signal that you're grouping an item within a field or whole field itself. Using the dollar sign ($) tells GA to output data from a specific field. $A tells the filter to pull from field A and $B will pull from field B. The number following A or B specifies the order of the item you’re selecting. For example $A1 represents the first item in Field A, while $B2 represents the second item in Field B.
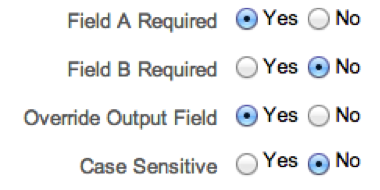
Below the empty fields are options to require Field A or B. Remember, you don’t need to use both fields. You can choose whether or not to overwrite any existing data for the dimension of the third field. Finally, you can specify whether or not you’d like the filter to be case sensitive.
Now that we’ve covered basic principles, let’s look at a couple of examples. We’ll start by adding a hostname to a request URI to view a full URL. You may want to create this type of advanced filter when dealing with multiple domains or subdomains in one view, such as example.com and exampleblog.com.
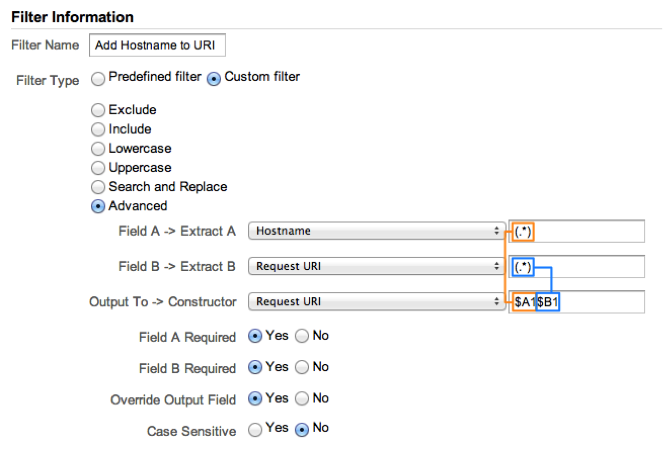
In this example, we’re telling GA to create a new request URI composed of the entire hostname and the entire old request URI. In Field A, we’re creating an item with parentheses, which includes the whole hostname. We’re doing the same with the old request URI in Field B. In the Output field, we’re referencing the first item in Field A with the string “$A1,” immediately followed by the first item in Field B, “$B1.” The 1 in “$A1” refers to the first item in Field A, so if we had multiple items in Field A, we could select the second item using “$A2.”
As a second example, let’s take a site, www.example.com, where all page titles look like “Example | Page.” If we’d like to only select text after the pipe symbol as the Page Title, we can use Advanced Custom Filters:
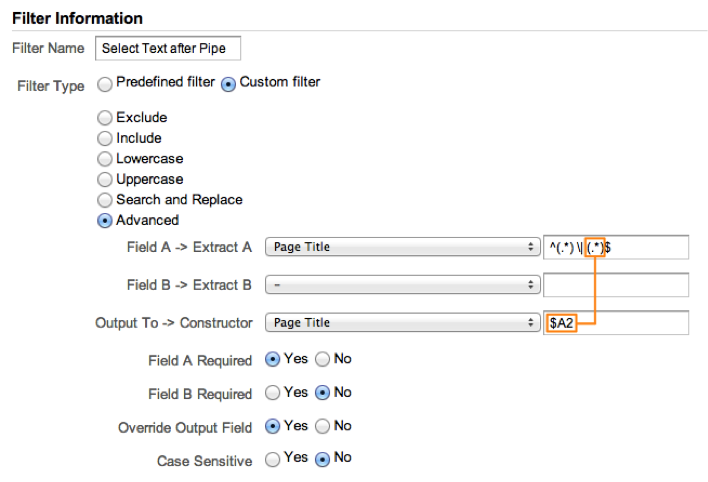
In this example, we only use Field A to accomplish our task. By using Regular Expressions, we can isolate the part of the page title after the pipe. Referencing the second item in the output field gives us a new, cleaner page title.
When using any filters, there are a few things to keep in mind. First, always have an unfiltered view. Once a filter reprocesses data through GA, the effects can not be undone. Second, always apply your filter to a test view first to make sure it works. If for some reason, your filter doesn’t work, you won’t lose any important data. Third, be cognizant of the order of your filters in the interface, since GA will process the data in the same order.
Now that you know how to set up your own Advanced Custom Filters, try out a few on your test views. Once you feel comfortable with your filters, move them to your main view and rewrite data to your heart’s content! If you’re interested in learning more about filters, be sure to check out Paul’s posts here and here, and take a look at our analytics and optimization services.