9 Tips for Doing Fast, Lightweight Research at an Agency
Curt Arledge, Former Director of UX Strategy
Article Categories:
Posted on
How to Move Fast and Research Things
Last year, we committed to doing more research at Viget. One of the ways I’ve been able to do my part is by honing in on a repeatable framework for doing lightweight qualitative research on almost any project. In this post, I want to share an approach that has become “methodological muscle memory” for me over the past year.
These nine tips form a basic template that can be tweaked to fit the needs of your individual project. This approach doesn’t make the usual distinction between the user research that you’d typically do before design starts and the testing and evaluation that you’d typically do after design is mostly done. In fact, it's most useful for projects where time constraints would normally limit you to only one (or none) of those types of research.
This lightweight approach isn't intended as an alternative to more formal research like highly technical usability testing or in-depth ethnography. It's a replacement for doing nothing. In an agency, that’s the choice we’re faced with more often than not.
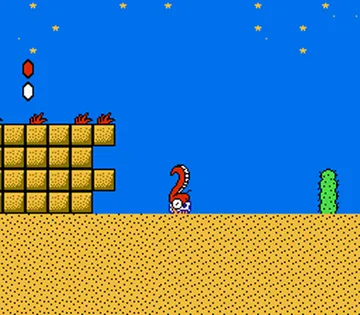
The consistent theme of these nine tips is to keep up your momentum and refuse to let research bog you down. Juggling research and design can be like the dreaded quicksand level in a Mario game. Not only do you have to contend with the usual puzzles and pitfalls of the design process, you have to do it without sinking into the planning, logistics, and analysis that have the potential to slow down research. These tips have helped me to keep making forward progress without getting sucked in.
1. Don’t Leave Your First Client Meeting Without Mentioning Research
This tip is more important than anything that comes afterwards. Get the ball rolling on research in the project kickoff meeting with your client. In that meeting, mention that an essential part of your design process is hearing feedback from real users. And then mention it again.
Also mention that the goal of this feedback isn’t in reaching statistical proof of a design’s success. Rather, it’s the bare-minimum precaution against designing something your users won’t understand or want. It’s a gut check, an empathy-building exercise, and a source of new inspiration. Most importantly, mention that your focus is on keeping research lightweight and fast, so it’s not going to slow down the design process. After all, it is the design process!
If you don’t mention research in your very first client meeting, you’ll have sent a clear message that it’s an add-on, not a core part of design. You’ll never get the buy-in you would have had if you had addressed it forcefully up front, which means you'll spend time continually justifying each step of the research rather than just getting it done. You’ll have also lost on opportunity to take advantage of one of the rare moments when everybody is in the same room to get a sense for who on the client side can help out with recruiting. Use this meeting to deal out some action items for identifying and contacting potential recruits.
2. Don’t Wait Until You Have a Research Plan
Start recruiting research participants before you know exactly what you’re going to do with them. Waiting until you have a perfect plan is a great way to lose your momentum or talk yourself out of doing research altogether. I’ve been guilty of this more than once.
Coming from the perspective of academic research, I’ve had to unlearn the tendency to be ultra-prepared. Flexibility and improvisation are anathema to academic research, but essential to design research.
Instead of starting with a research plan, start with a commitment to put something in front of your users at the earliest possible opportunity.
Instead of starting with a research plan, start with a commitment to put something in front of your users at the earliest possible opportunity. This can be a single screen, a more complex prototype, or even just a concept. You don’t even have to wait until you have something to show. At the beginning of your testing schedule, sessions might just be interviews. Within a week or two, you might have a full-fledged prototype that supports task-based usability testing. Treat your research plan as a living document that evolves over the course of your project.
If you feel like things are moving a little too fast and you aren’t as prepared as you’d like to be, that’s good! You’ll figure it out. Nothing focuses the mind like the fear of sounding like a dope to a stranger.
3. Lean on Your Client for Recruiting
Recruiting can be one of the biggest time sucks in the research process. If you can possibly shift some of the work of identifying and recruiting users to your client, do it.
In many cases, someone on the client side will already have a good idea about who to target and how to reach them. There may be Customer Service staff who are eager for the opportunity to show existing customers their commitment to improving their experience. Even if you need to recruit people who have never heard of your client’s company or product, a contacts-of-contacts approach can be a good way to leverage an existing user base to get in touch with newbies.
Recruiting can be one of the biggest time sucks in the research process. If you can possibly shift some of the work of identifying and recruiting users to your client, do it.
Of course, there are things you should do to make recruiting easier for your client. Build them a spreadsheet with quotas for each user type and cells for the contact info and details you need. Once a person gets added to this spreadsheet, it's your job to take over with scheduling that person for a session. It's also a good gesture to provide your client with a boilerplate script for reaching out to recruits. Part of that is establishing what incentive you’re going to provide and who’s going to send it (your client will probably want the incentive to come from them, so that's one more thing you can take off your plate).
A good rule of thumb is to recruit 5-10 people for each distinct user type (shoot for 10 and you’ll probably wind up with 5 after cancellations and no-shows). You might want to get a mix of people with different levels of expertise or familiarity with the thing you’re testing. However, it’s important to emphasize quality over quantity when recruiting. A handful of recruits who truly represent your target users are worth a lot more than a bunch of non-representative users.
4. Automate Scheduling with pow wow

Once you start building a list of confirmed recruits, there’s an incredibly useful tool that makes scheduling time slots for research sessions a breeze. Pow wow connects to your Google Calendar and lets you set a range of time slots when you’re available for users to sign up. It then automates the reservations and sends customizable confirmation and reminder emails for you. Trust me: a few minutes of setup will save you dozens of back-and-forth emails.
Full disclosure: Viget made pow wow, and it's awesome!
5. Research and Design in Parallel
I recommend giving recruits lots of scheduling choices over the course of a few weeks rather than trying to force them into a handful of back-to-back slots over a few days. This allows you to do research on an ongoing basis while you’re designing, rather than clumping it all together before or after most of the design has been done.
Designing in parallel to research – whether you’re the designer or someone else is – creates a useful feedback loop between your design explorations and the feedback you’re hearing from users. Instead of slowing things down, this feedback loop can actually accelerate the design process.
Designing in parallel to research – whether you’re the designer or someone else is – creates a useful feedback loop between your design explorations and the feedback you’re hearing from users.
One effect of scheduling research sessions while you’re designing is that it helps focus your attention on the parts of the design where getting user feedback is most critical. What are the assumptions you’re making that could mean the difference between success and failure? Focus on validating those assumptions when you’re talking to users, make the necessary changes to the design, and keep moving.
6. Keep Sessions Under 30 Minutes
Whatever you need to learn from a research session, you can probably learn it in 30 minutes. At least, you should try to.
A 30-minute session is breezy and manageable for participants and researchers. Longer sessions start to feel like a substantial commitment to participants and encourage the researcher to pad the session with unnecessary questions and tasks because there’s plenty of time. Shorter sessions also allow you to talk to more total people without eating into your schedule too much.
Strive for crisp, concise testing scripts. Your script should be at most two pages long, including all of the boilerplate intro (“I’m not testing you, I’m testing the product,” etc.). Cut out any questions that aren’t strictly necessary. Do you really need to know if the participant uses a Mac or PC? What are you going to do with the knowledge that she considers herself a novice-level computer user, and what does that even mean?
7. Use GoToMeeting for Remote, Recorded Sessions

In my experience, the logistical friction involved in in-person testing almost always outweighs the benefits when conducting short, lightweight user research sessions. Unless you absolutely need to be in the same room as your participants, modern screensharing tools make remote testing easier for everyone involved. You’ll spend more time researching and less time waiting for late participants or fielding phone calls about parking.
These days, I prefer using GoToMeeting because of its web interface and out-of-the-box support for recording video of sessions. I also like the ability to give the user mouse and keyboard control over my own screen, which is useful if my testing prototype is only half-finished and requires occasional intervention from me, like moving the participant to a different browser tab.
8. Use InVision for Simple Prototypes

InVision is one of the best ways to put designs in front of your users. It has a user-friendly admin interface and requires no development expertise to create simple to moderately complex prototypes for desktop or mobile from flat image files. (InVision has a number of handy integrations as well, but it's useful without them too.) The type of user feedback you need will inform the fidelity and complexity of your prototype, but you don’t need to wait until you have something that feels “real” to get useful feedback.
The type of user feedback you need will inform the fidelity and complexity of your prototype, but you don’t need to wait until you have something that feels “real” to get useful feedback.
In some cases, a single screen might be all you need. For example, a static homepage wireframe is sufficient to do a basic evaluation of the site’s navigation. You can learn a lot from questions like, “Where would you click to find information about ticket sales?” or, “What types of things would you expect to find at the link called Resources?” Once you’ve designed more screens, just add them to your prototype and link them up with clickable hotspots.
Sometimes it’s more important to mimic the appearance of a real, working website or app, like if you’re evaluating impressions of style and messaging. But you don’t need to wait until you have a polished prototype to start learning something from users. InVision is a great way to evolve and extend your prototype over time with a minimum of fuss and overhead.
9. Keep Analysis Lightweight
I could write an entire post on research analysis, because your research is only as good as the sense you make of it and the impact it has on the project. For now, suffice it to say that you should treat your analysis with the same spirit as the preceding steps: keep things moving forward, analyze as you go, and don’t wait until you have something “complete” to share what you’ve learned. A few tips:
Include team members in the data collection – both the internal team and the client team. This helps distribute understanding and decreases the burden of a big reveal by exposing everybody to user insights throughout the process. A good way to do this is to invite team members to rotate through the role of note-taker for each user session.
Share your notes and recordings from each session immediately after it’s over. If you share a Slack group with your client, create a #rawresearch channel specifically for sharing raw notes and recordings.
Send out a weekly mini-analysis with the takeaways from that week’s research. Discuss what actions you plan to take in response to what you learned.
As with any analysis, pay more attention to what people do than what they say, and don’t react to everything you hear or observe too strongly until you see it at least a second time with another user.
With that said, don’t wait until you have rock-solid statistical proof to tweak your design. Don’t overcommit to your design and cherry-pick positive feedback to avoid having to make changes.
Conclusion
This approach to research may not be a perfect fit for your project, but you can treat it as the Default Option and customize it as needed. Applying these steps to my work has allowed me to fit research into projects that otherwise wouldn’t have had time for it.
In summary, some closing thoughts: Get ahead of yourself on research and don’t lose momentum. Don’t wait until you have a complete plan or a perfect prototype to make time to talk to your users. You’re not in an academic research lab, you’re making stuff! So get started!
