Figma Tips For Non-Designers, Part 1: Structure & UI Basics
Mindy Wagner, Former Design Director
Article Categories:
Posted on
A quick breakdown to help you hit the ground running in Figma.
The more time our designers spend in Figma, the more it has become a default tool for deliverables of all kinds. Not just comps and wireframes, but also research, workshops, brainstorming sessions, concept maps, timelines, presentations... you name it, we’ve probably created it in Figma.

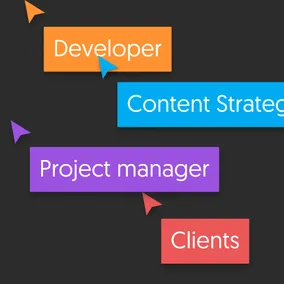
While it was easy for designers to transition into Figma from other design tools, it hasn’t been quite as straightforward for other project team members. Not a lot of crossover between, say, Google Sheets and Figma -- so it’s not nearly as intuitive for them to become power users. In an effort to make collaboration easier, I’ve been sharing the basic Figma concepts and tools with other cross-functional teams at Viget.
Below are a few things I’ve found especially helpful for bridging knowledge gaps. (Note - this is not dev-focused. Though that may be a future article!)
Getting Started:
First things first - there’s a browser app and a desktop app. There isn’t a huge difference between the two, but the desktop app removes an extra step when you install fonts so that’s the one I recommend. There’s also an iPhone/iPad mobile app, which I highly recommend for QAing tablet & mobile comps.
Figma saves automatically to the cloud and allows for real-time collaboration with teammates in a single file. You don't have to worry to much about "screwing up" someone else's work because it automatically saves a version history, similar to Google Docs. So while it might feel scary to jump into a collaborative file and start messing around, it's actually pretty low risk.
Understanding Figma’s Structure:
When interacting with or creating new Figma files, it’s helpful to know some basics about the way things are structured. The levels of organization you’ll likely be interacting with day to day are: Projects, Files, Pages, and Frames.
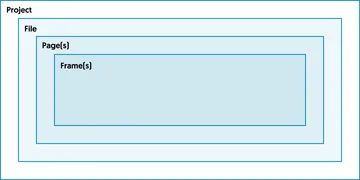
Projects
Projects are probably being set up by your designer, who can then invite other editors and collaborators. At Viget, because we’re currently on the Professional pricing tier, we typically create one Project per client. When naming a Project, the Viget convention is: [Client Acronym] Client Full Name. Ex: [HRC] Human Rights Campaign.
Files
Files provide the canvas where you can arrange layers and objects to create designs. They’re the cards you see when you click on a Project. At Viget, we typically have multiple Files for each project. If someone sends you a link to something, it’s probably a File.
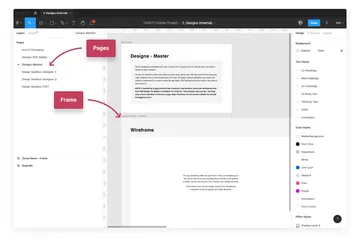
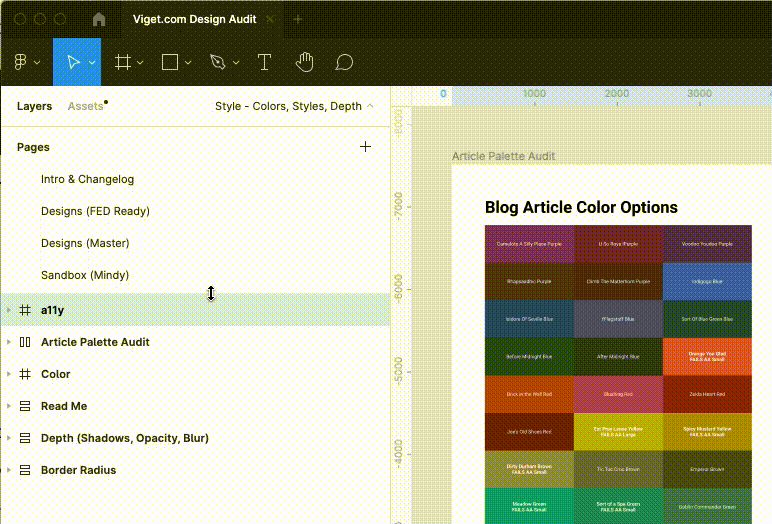
Pages
Pages are found inside of Files, in the panel on the left. Files can have a number of pages, and they are a great way to organize different content types.
Frames
Frames are the last level of Figma structure, and are basically containers within pages. For most projects, a Frame will hold a wireframe, page comp, or reusable component. They’re also handy for creating slides for presentations. Frames are essentially mini canvases. You can (and will) have lots and lots of frames on a Page.
Figma’s UI:
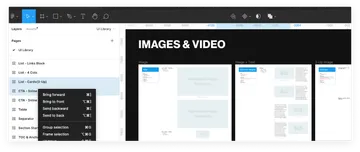
There are two sidebars in Figma. Once you’re in a File, the left sidebar will show you Pages (top) and Layers (bottom). Anything you create on the canvas will have it’s own Layer.
The right panel contains three key tool sets - Design, Prototype, and Inspect.
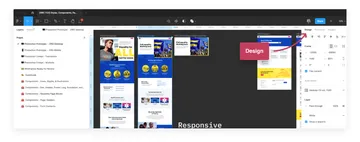
The Design panel is where Designers spend most of their time. It’s where you can set width and height values, styles, strokes, effects, image layers, etc. It’s also where you can export images, graphics, and PDFs.
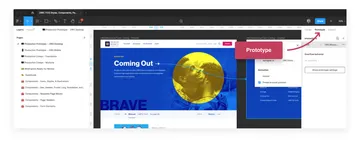
The Prototype panel is where you can create prototyping behaviors and links. Prototyping in Figma is shockingly easy, so don’t assume you’ll never use this! While you can use Prototyping in Figma to create product testing and walkthroughs, you can also use it for presenting wireframes/comps or slides. If you don’t add any links to your FIle, you can navigate through Frames using the < and > keys on your keyboard. Figma will navigate through the Frames on a Page from top to bottom and left to right, so when you make a slide deck just make sure it follows this pattern. Sidenote: If you add a single Prototype connection anywhere in your File, the < > navigation through frames will no longer work. For this reason, we often have one File for presentations and another File for user testing prototypes.
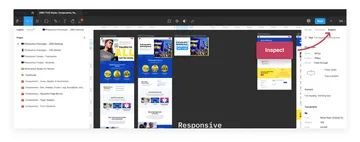
The Inspect panel offers an easy way to extract code information from a specific page element. Details you can find in the Inspect panel include HEX color values, font weight/style/size, and pixel width/height values. Code values will be displayed by clicking on a layer. The right hand panel provides code data for color values, typography, position and sizes. It’s a great shortcut for FEDs to know about during buildout, and it’s helpful for anyone QAing the final product.
Tips for Viewing, Sharing, and Presenting:
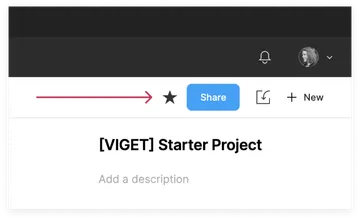
When you’re viewing Files and Prototypes, be sure you’re reviewing at 100%. I’ve had many a client or Project Manager think the work looks “too small” because their viewing size was defaulting to something smaller. Before sharing prototype links, I always check to be sure I have my Options set to “100% - Display at Full Size”. To get to the Prototype view, hit the Play arrow right next to the Share button in the File UI.
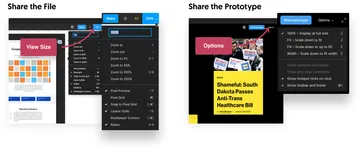
To share work with others, you can hit the Share button in either the File or the Prototype view. Note that sharing the File will share everything in that File, not just the Page you’re looking at. If you share a File with clients, note that you’ll also be sharing things like comments. Figma has some tweakable share settings, so be sure to review them before sharing a link out. Sharing a Prototype only shares the Prototype by default - it will (helpfully) not give people access to the corresponding File, so they won’t see behind the scenes stuff. Before sharing, I typically deselect “Show toolbar and footer” when sharing with clients so they have the cleanest viewing experience.
When presenting in Figma’s File view, you can hit [CTL+\] or [CMD+\] to toggle the UI panels on and off. When you’re in the Prototype view, hitting [⌘+\] or [^+\] will hide the toolbar and footer for a cleaner view.
Phew. That’s a start! For more, check out Figma Tips For Non-Designers, Part 2: Components, Styles, Frames and More