Blendid HTTP/2 Upgrade

Ben Tinsley, Former Front-End Developer
Article Categories:
Posted on
Using Blendid's new upgrade, take advantage of HTTP/2 multiplexing for faster sites and apps!
Updates
While your server requires being HTTP/2 compliant before taking advantage of this upgrade, browsers require HTTPS compliance to ensure your site is secure for an HTTP/2 connection.
After spending about a year experimenting and blogging about how HTTP/2 is going to improve performance and finding ways it can be applied to projects, we have added an HTTP/2 upgrade to Blendid so you can try for yourself. If you are unfamiliar with Blendid, Blendid is full-featured modern asset pipeline powered by Gulp that utilizes many helpful stand-alone tasks. At Viget, we use it for many front end builds for its ease of use and simple configurability.
To use Blendid with the HTTP/2 upgrade, follow these steps:
- On a new project, run
yarn initfrom your terminal in the project’s directory, which adds apackage.jsonandyarn.lockfile to your directory - Then run
yarn add blendidto add the Blendid package to the project - After that, run
yarn run blendid -- initto ensure the Blendid directories are in place - Finally add in
yarn run blendid -- http2-upgradeand you are donezo
The Blendid HTTP/2 upgrade takes advantage of multiplexing, which allows for multiple assets to be called at once without bogging down the network. HTTP/2 can take multiple requests and fetch them simultaneously. Previously, Blendid concatenated all of your stylesheets and JavaScripts into single files to be loaded on every page. Now, the HTTP/2 upgrade processes CSS and JavaScript as separate files so that you can load them individually and only on pages where they are needed.
One large point before you get going is that this HTTP/2 upgrade will only work as expected if your server is HTTP/2 compliant. If you are not sure, I recommend you check in with your hosting provider. Most do offer HTTP/2 servers, so in some cases, it may be as simple as flipping a switch. It's also worth noting that all browsers require HTTPS to open HTTP/2 connections, so it's best to make that server side update as well to get the benefits of multiplexing on projects that use this.
Now that we have that out of the way, let's take a look at how this works.
Working with the styles
Once you run yarn run blendid, take a look in src/assets/stylesheets and you will notice the stylesheets broken into three main directories: config, global and components.
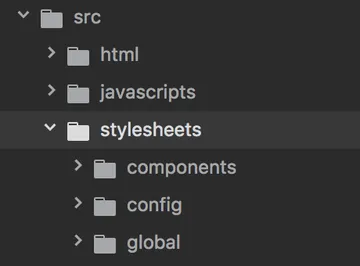
The config directory will hold all of your variables, mixins, functions, and other helpers needed at compile time.
The global directory will hold CSS that is global across your site or app. This can be the reset, header and footer styles, typography, layout and even button styles. If it appears on every page, place it in this directory. Ensuring that you bring in the helpers defined within config allows you to have access to all the variables and functions defined here. Everything in the global directory will be automatically compiled and placed in the <head> tag.
Finally, the components directory. A component can be anything from a hero image to a set of dialog modals. It is really up to you. This directory is the one that fully takes advantage of HTTP/2. It creates a separate stylesheet for every directory within components. Much like the global, you should include a reference to config helpers in each component. Once you have done that, you can make your components as big or as small as you see fit.
Working with the HTML
As mentioned, the global styles will automatically be inserted on every page. It is up to you to add the component styles. Since HTTP/2 does not get clogged when you try to make multiple requests at the same time, we should take advantage of this! For every HTML component you make, write a CSS component that only includes the styles and classes defined in the HTML. With a nunjucks CSS helper written specifically for this task, you can pull in the CSS component inline at the top of every HTML component.
Check it out in action here:
{# base stuff here #}
{% extends 'layouts/application' %}
{# your css helper which loads the styles only applicable to this component #}
{{ macros.css('example-component') }}
{# the HTML of your component #}
<div class="example-component">
<p>Some text</p>
<p><strong>Some strong text</strong></p>
<p><a href="www.link.com">a link</a></p>
</div>Everything in the example-component CSS defined on line 4 should only be applicable to this specific HTML component. This prevents your site or app from loading styles that are not currently on the page. This cuts down load times and improves performance.
To get a better understanding of how the CSS helper works, see its definition here. All it is doing is looking for a component in the CSS components directory with the same name and outputting its index file in a <link> tag.
One thing to note, is the HTTP/2 upgrade task is currently built to work out of the box for the default init task. It won’t work right away with the Craft, Drupal or Rails tasks, but implementing them there should be simple. All you would need to do is link to specific component level stylesheets at the top of each HTML component, either with a helper you write yourself or just a straight <link> tag that references it.
One last note
I encourage you to install the package and play around with it, but I have to remind you that you really won't get any benefits from using this without configuring your server for HTTP/2. In fact, it will actually hurt you by bottlenecking the network with a bunch of requests. But once you have a server that is HTTP/2 ready and secured using HTTPS, have at it and create leaner, more performant sites that give your users only the assets they need as they need them.