WordPress Theme Development with ACF Custom Blocks: Part 1


Here's my case for making the switch from Flexible Content fields in Advanced Custom Fields Pro (ACF) to custom Gutenberg blocks (without React!).

I have witnessed many changes over the past 20-plus years that I've been building websites. One thing I have learned is to be cautious before jumping onto a bandwagon. This behavior has had both positive and negative results, but has ultimately proven successful. When it comes to new technologies and methods, I like to let them simmer a bit to see if they’re going to stick around.
Building custom websites with WordPress is no different. As the internet has evolved, TinyMCE as a complex content editor just wasn’t cutting it. There have been many attempts to force TinyMCE to bend beyond its capabilities in order to give users control over the content while also implementing customizable layouts.
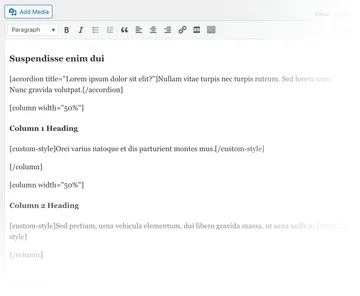
The most common was the use of shortcodes to wrap text and images to achieve basic structures such as columns, side-by-side content, and full-width content. You were required to not only understand what the shortcodes did, but which ones were available to use.
As some reached for page builder plugins (such as Beaver Builder, Elementor, or Divi) to replace this workflow, many took a different direction because the page builder approach seemed clunky, inefficient, and was ultimately a bad client experience. While the Block Editor (Gutenberg) was still baking in the oven, many turned to using Advanced Custom Fields (Pro), a custom fields plugin, to create custom page layouts. This plugin gave developers an opportunity to control most of what went onto a page without worrying about a client accidentally breaking something. They were given very specific fields with very specific criteria to manage the content on their site. There have been other plugins, tools, and libraries that accomplished the same thing, but nothing compared to the features and simplicity available in ACF Pro.
Flexible Content Field Approach (The Old Way)
ACF Pro’s introduction of Flexible Content fields in version 4 (released in 2014) was somewhat of a game changer when it came to using ACF Pro to build sites. It was this new iteration that gave clients more control while also keeping them within the confines of a defined template. This method became the new standard for building custom sites and is still being used today! I even wrote a plugin to try to help streamline this process.
There were many pros and cons to this approach.
| PROS | CONS |
|---|---|
|
|
A very good friend of mine, Brian Krogsgard (founder of Post Status), taught me from day one to always try to do things “the WordPress way." The idea is simply to provide a common user experience by being consistent with the way WordPress does things. Backward compatibility has always been a high priority for WordPress, and sticking to this concept will lengthen the life of a website you build as well as your process for building them.
Using Flexible Content fields goes against this idea by separating your content into broken-up parts and storing them in a database table that wasn’t designed to house this type of content. It also requires over-complicated methods to retrieve the data in its serialized form for integration with SEO. Making simple changes to layouts became a hassle and often required a developer to modify code.
While this method worked OK for a very long time, it wasn’t ideal; it was time to start considering a new approach — once Gutenberg was released out of beta into WordPress Core – to get back to the WordPress way.
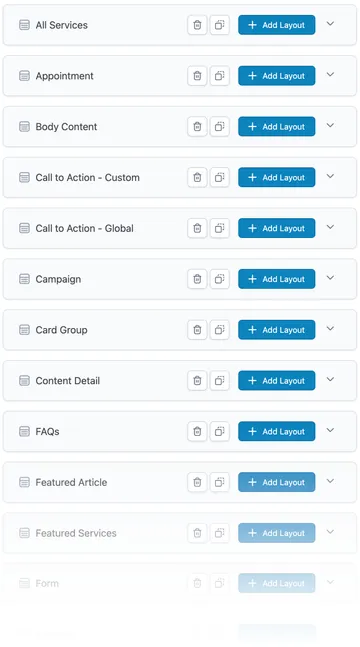
Introducing ACF Blocks
What if I told you that you don’t have to be a React developer to create custom blocks?
{
  "name": "sample",
  "title": "Sample Block",
  "description": "A sample block for demonstration purposes only.",
  "icon": "welcome-widgets-menus",
  "category": "custom",
  "keywords": ["custom", "theme", "demo"],
  "acf": {
    "mode": "preview"
  },
  "supports": {
    "jsx": false
  }
}
The ability to create custom ACF blocks was released as part of Advanced Custom Fields Pro version 5.8 in 2020, and in my opinion, it really opened up the possibilities for using the block editor as a non-React developer. I was immediately intrigued by this feature and very eager to put it into practice. The new WordPress Block Editor (Gutenberg) had been around for about 2 years at this point, so it had a decent opportunity to work out some of the kinks to evolve into a solid block editor experience. This was the perfect time to move on to the next thing!
And this is not specific to just users of ACF Flexible Content fields. Anyone that hasn’t made the jump over to using the block editor would benefit!
Advantages of Moving from ACF Flexible Content to ACF Blocks
One of the biggest benefits of switching to ACF Blocks is leveraging the current WordPress standard for building content. Again, this goes back to doing things the “WordPress Way” and, while still dependent on ACF, this change will bring you one step closer to native blocks.
Your content is stored where WordPress intended, inside the post_content field in the posts database table. Now, most (if not all) of the content needed to render your template is returned as part of the primary database query, improving performance by reducing additional queries to the postmeta table.
Switching to ACF Blocks aligns your development process closer with the native block-based approach intended by WordPress. This ensures better compatibility with future updates and enhances the overall editing experience for both developers and content editors. It also gives you the advantage of mixing them with the built-in core blocks as well as other ACF Blocks, making more complex layouts easier to create and more visual.
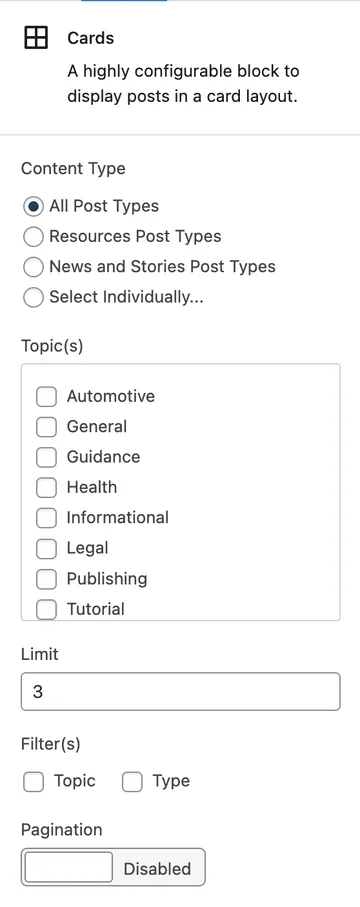
With ACF Blocks, you can provide content editors with more granular control over their content. By defining specific fields and options within each block, you empower editors to customize and manage their content without the risk of breaking the layout. This level of flexibility leads to a more efficient editing process and reduces the dependency on developers for every content update.
By embracing custom ACF blocks, you future-proof your WordPress theme development. As the block editor continues to evolve, custom blocks will remain at the forefront of WordPress development practices. This ensures that your themes remain compatible and adaptable to future changes, without the need for major rework or migrations.
The Cherry on Top: InnerBlocks
<InnerBlocks
template="<?php echo esc_attr( wp_json_encode( $block_template ) ); ?>"
id="<?php echo esc_attr( $block['id'] ); ?>"
allowedBlocks="<?php echo esc_attr( wp_json_encode( $allowed_blocks ) ); ?>"
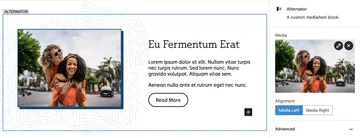
/>One of my favorite features included with ACF Custom Blocks is the ability to use <InnerBlocks />. This tag acts as a placeholder to wrap a section of your custom block to nest other blocks, almost completely eliminating the need for WYSIWYG fields and opening up amazing possibilities for a robust, modular editing experience! This is a great way to include an easily customizable area that doesn’t require configuring, modifying, or rendering content in custom fields for that portion of the block.
When using InnerBlocks as part of a custom block, you can also utilize some of the features that come along with it. The “template” attribute allows you to define a basic initial structure of the content that would go in that section. For example, if you wanted to build a custom Hero block, you may want to start the editor off with a Heading 1 tag (<h1>). While it’s not required, it’s super helpful to users to already have some common, generic blocks in place, and speeds up content entry.
It also doesn’t have to be the wild west when it comes to what blocks can be used in InnerBlocks. With the ”allowedBlocks” attribute, you can specify which types of blocks can be nested within that section, giving you complete granular control over that particular area of your custom block. So in our previous Hero example, you can restrict users to only the Heading 1 tag within this area.
Ready to make the switch?
If this post has encouraged you to start using ACF Blocks on your next project, stay tuned for Part 2 where I’ll get into some code samples, share our method for structuring custom blocks, and provide some resources and documentation for digging deeper.