Pixel Perfect Text Between HTML5 Canvas and ImageMagick
Nate Hunzaker, Former Development Director
Article Category:
Posted on
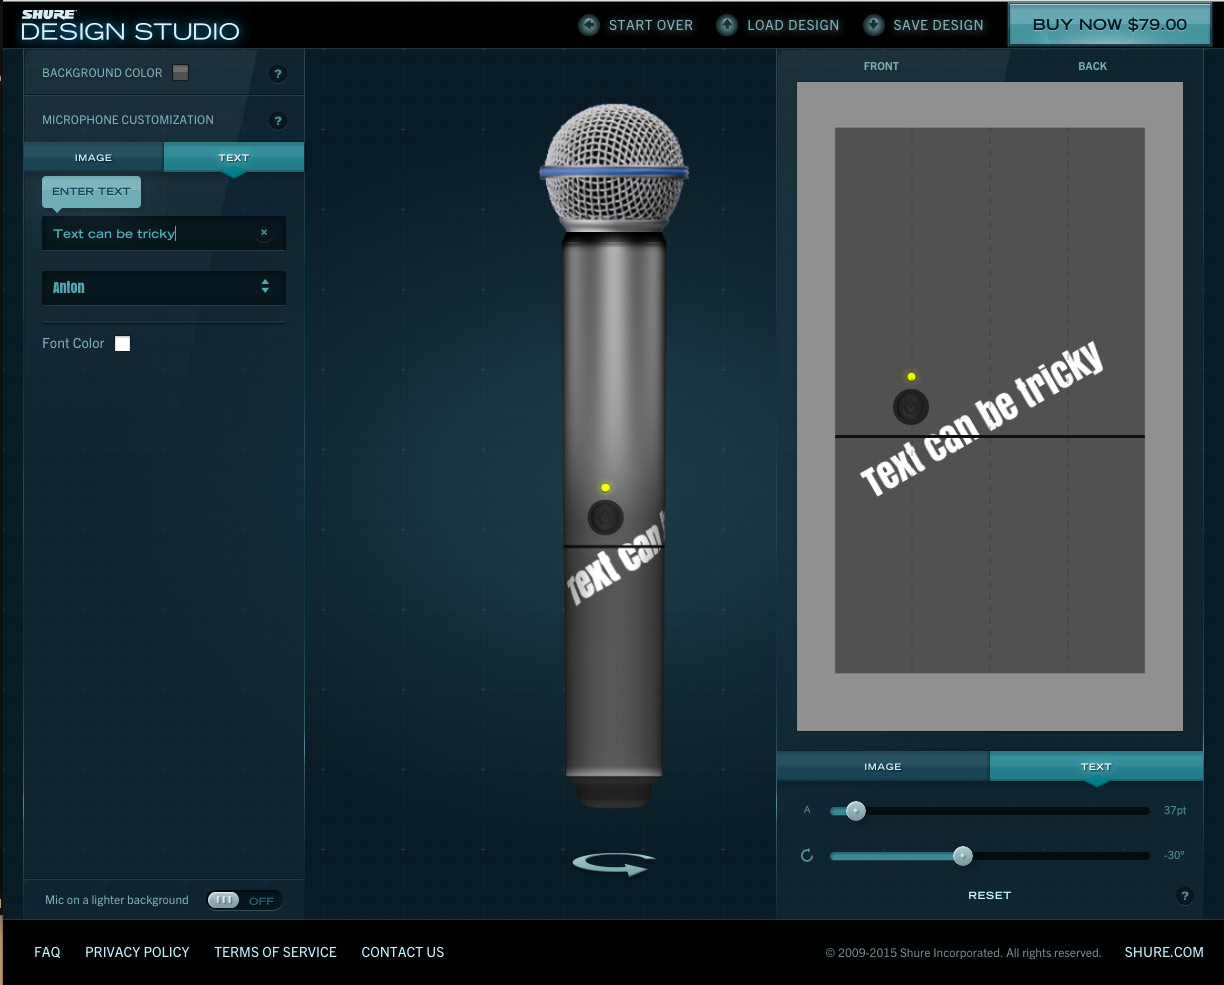
Recently we built a tool for designing microphones in the browser. When a user is ready to make a purchase, the server generates a super high-resolution version of their design for checkout.
This ensures that microphones look fantastic when they reach a customer's doorstep. It also introduces a couple of challenges when synchronizing text placement with the browser. Specifically we noticed inconsistencies in positioning between ImageMagick and HTML5 canvas.
In this post I'll walk through our approach for solving this problem and some of the interesting points along the way.
Drawing text to an HTML5 canvas is fairly straightforward:
var canvas = document.querySelector('canvas')
var ctx = canvas.getContext('2d')
ctx.font = '50px Helvetica'
ctx.fillStyle = 'black'
ctx.fillText('Viget Labs', 0, 200)
However unlike CSS, where the transformation origin is at the center, the anchor for a canvas is found at the top-left (0, 0). This means that, without intervention, rotation (and other transformations) affects the overall position of the target. Most users don't expect this behavior; manipulating objects along the center is the standard. To better illustrate this problem:
There are a couple of ways around this, such as setting text alignment to center before rendering text. However the method we found to be a best fit for both canvas and ImageMagic was:
- Translate to the desired position, offset on the x-axis by half the width
- Perform other transformations (rotate, scale, skew...)
- Inversely translate on the x-axis by half the width
- Draw
Visually, this looks like:
Without animation between steps, this looks like:
Now what about ImageMagick? To measure text we first use convert to render the given text with the proper typeface and size. Then we measure the dimensions of the produced graphic to determine the offset required to rotate around the center (just like in canvas!).
With concessions for brevity, the following Ruby script does just that:
require 'mini_magick'

class Design
  TEMP_TEXT_PATH = "./test_text.png"

  def initialize (design)
    @design = design
  end

  def opened_template
    @opened_template ||= MiniMagick::Image.open(@design[:template])
  end

  def apply_text
    opened_template.combine_options do |c|
      c.font @design[:typeface]
      c.fill @design[:color]
      c.pointsize @design[:pointsize]
      c.draw "translate #{@design[:x] + half_text_width},#{@design[:y]} "\
             "rotate #{@design[:rotation]} "\
             "text #{-half_text_width},0 '#{@design[:content]}'"
    end
    opened_template
  end

  def text_output
    @text_output ||= begin
      `convert -pointsize #{@design[:pointsize]} -font '#{@design[:typeface]}' label:'#{@design[:content]}' #{TEMP_TEXT_PATH}`
      MiniMagick::Image.open(TEMP_TEXT_PATH)
    end
  end

  def half_text_width
    text_output[:width] * 0.5
  end
end
A simple application of this script looks like:
# Produce a fake template for us to print upon
template = "./result.png"

`convert -size 400x400 xc:white #{template}`

# Generate a new design object
design = Design.new({
  template: template,
  color: '#1496bb',
  content: 'Viget Labs',
  pointsize: 50,
  rotation: 45,
  typeface: 'Helvetica',
  x: 80,
  y: 220
})

design.apply_text.write(template)
Many thanks to Mike Ackerman for the brilliant thinking here. This code is also available as a gist.
In text_measurement, a temporary image of raw text output is generated, which acts somewhat like ctx.measureText in JavaScript. Once this is done, the offset value can be determined by accessing the :width attribute of the object produced by MiniMagick on line 33. With a proper offset value, all that remains is to set up the text parameters and perform the exact same operations found in the earlier canvas examples, by executing apply_text.
This will produce two images. The first is the direct output of painting text. The second is the final result of applying this text with transformations on a 400x400 pixel canvas.

A quick diff of the final output and the result within the HTML5 canvas confirms their accuracy:

There are probably other methods to do this, however I really like how similar the operations are between the server and the client. When working through this problem, having mirroring approaches significantly reduced the cognitive load required to visualize the problem. This was particularly useful when many additional transformations were applied, making revisions to the process an easier task.