Crash Course: VR Design for N00bs
Kaitlyn Irvine, Former Designer
Article Category:
Posted on
Our latest experiment in virtual reality—a WebVR adaptation of Lights Out.
We have a tradition at Viget of experimenting with our own ideas, independent of client work. But, honestly, it’s been too long since we built something pointless. Today, we’re debuting our latest experiment in virtual reality—a WebVR adaptation of the classic circuit-board puzzle Lights Out. It’s a one-player game, with the objective of turning all the “lights” in the grid off.
Sure, the final product is neat, but how did we get there?
Jumping into the VR metaverse is overwhelming. I was disappointed to find there are tons of libraries for developers—but very few centralized resources for designers. As creatives, we pride ourselves on our ability to apply design thinking to everything. So, where are all the thought leaders in VR design? There’s little to no consensus around even the most basic design standards—like typography or accessibility.
Basically, VR design is a wild west free-for-all.
However, instead of seeing this as a deterrent, I see it as a call to action. The more we create, the faster we learn. This is an opportunity to define the future web. Here’s a crash course to get started:
1. Know the difference between VR and WebVR
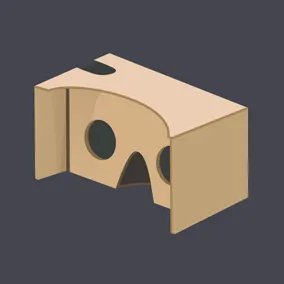
What’s the difference between VR and WebVR? The accessibility of the technology. WebVR doesn’t require any additional (very expensive) equipment to get started. All you need is a laptop, some WebGL chops, and a viewer—like Google Cardboard ($15). We actually did all of our prototyping with a Cardboard and the View-Master Deluxe VR Viewer ($40). WebVR is ideal for applications with light content and short user durations.
Better yet, users don’t even need to visit the app store. With WebVR, you can engage with the experience directly from your smartphone or desktop. Since it lives on the web, not in a native application, all viewers need is a simple hyperlink.

2. Put yourself in a box
Defining constraints in the beginning is essential. Frame them as actionable goals. For Lights Out, we wanted this experiment to be short and sweet. We decided on 3 constraints: we would build this for WebVR, Google Cardboard was our target device, and the project would last 4 weeks.
Aside from all the reasons why WebVR is awesome above, working with simple viewers like Google Cardboard afforded us energy to focus familiarizing ourselves with the basics—like integrating Microcosm with WebGL.
3. Before you sketch, read
Specifically, read Mike Alger’s paper on Visual Design Methods for VR. It’s the most comprehensive resource for volumetric user interfaces. While this paper primarily explores interface design of a VR-based operating system, his theories around content zones (pp. 36-46) were especially insightful for our exploration. If academic papers aren’t your thing, you can also watch his condensed VR Interface Design manifesto.
Leap Motion, a VR product company in San Francisco, also has a fantastic compendium of articles on everything from establishing space and perspective to sound design. This particular article dives into their initial explorations in user interface design.
4. Set up proper art boards
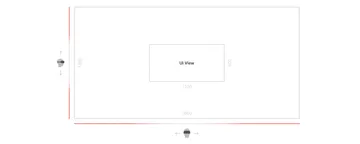
Sometimes the simplest tasks in a new medium are the hardest. I had to Google this. The width of your entire canvas should be 3600 pixels wide by 1800 pixels tall—which cleverly translates to 360° by 180°. Remember that only a portion of this segment is viewable at any given time. The dimension of the UI view is roughly 1,200x600 px. Here's an example of the setup I used for my UI. I denote these spaces as such in my working files:
5. Retina displays are not your friend
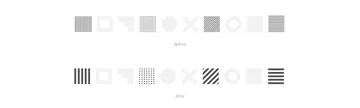
As we moved into prototyping, one of the first things we noticed was aliasing. As a result, I had to go back in and amend my designs to account for the low-fidelity output. Details like the fine, crisp lines had to quadruple in width and spacing.
6. Design and export textures in powers of two
If your interface contains any kind of SVG pattern, you’ll need to export them with sides equivalent to the power of 2 for optimization purposes. This is more efficient to store in video memory and easier for WebGL to map within the final geometry. Each side should be: 1, 2, 4, 8, 16, 32, 64, 128, 256, 512, 1024, or 2048 pixels. Refer to the Mozilla Developer Network for more context on using textures in WebGL.
Finally, accept the fact that whatever you make—it will probably be bad.
Do you remember what websites looked like in 1999? Shudder. No one really knew what they were doing. But that’s how you learn, by trying (and failing). I’m sure we’ll all laugh about the first VR experiences 10 years from now. They’ll be kitschy and nostalgic, like arcade games. Embrace it.
Prayash, the creative developer in this collaboration, is currently working on a WebVR tutorial as a follow-up to this article. Excited? Me too. Tweet @_prayash and tell him you can't wait to see it.
In case you missed it at the top, try Lights Out and tell us what you think. And if you beat level 2 let me know—I still haven't figured it out yet.