Copying Text From Images to Your Clipboard
Jeremy Frank, Former UI Development Director
Article Category:
Posted on
Updates
After updating to macOS Sierra and updated Homebrew, the original automator service no longer worked. I've since updated the shell script code example below to no longer source .bash_profile source, and instead, point directly to /usr/local/bin, where Homebrew symlinks to installed packages. I've also removed the -psm flag, due to some undesirable results.
Getting the text out of a raster-based image when you don’t have access to the original source files is something that no one looks forward to. Retyping text is a waste of time, and waiting to get original source files is inefficient. What you really want to do is to take a screenshot of just the text portion of an image, then paste the actual text in your application, like this:
Fortunately, this is entirely possible. Before you can get to a magical copy and paste workflow though, you’ll have to first get your hands on the Tesseract!
No, I’m not talking about the Infinity Stone of unparalleled power, I’m talking about Tesseract the OCR engine that was developed at HP Labs in the ‘80s and ‘90s, which is now being supported by Google. The workflow solution to the problem I described above is to use a keyboard shortcut for invoking an Automator service, which then displays crosshairs for you to select an area of the screen as a screenshot for Tesseract to parse, then finally placing the text content in your clipboard, ready for pasting!
Step 1: Install Tesseract Via Homebrew
Open Terminal, and install Tesseract via Homebrew:
brew install tesseract
If you don’t have Homebrew, install it first by following the instructions on the home page.
Step 2: Create a Service With Automator
Open Automator and create a new service with the “Run Shell Script” action. Make sure to set “service receives” to “no input.” This makes it available in all applications. Save your service as “Screenshot to Text.” Any name will do. Then add the following code to the shell script window:
screencapture -i /tmp/ocr.png
/usr/local/bin/tesseract /tmp/ocr.png /tmp/ocr
cat /tmp/ocr.txt | pbcopy
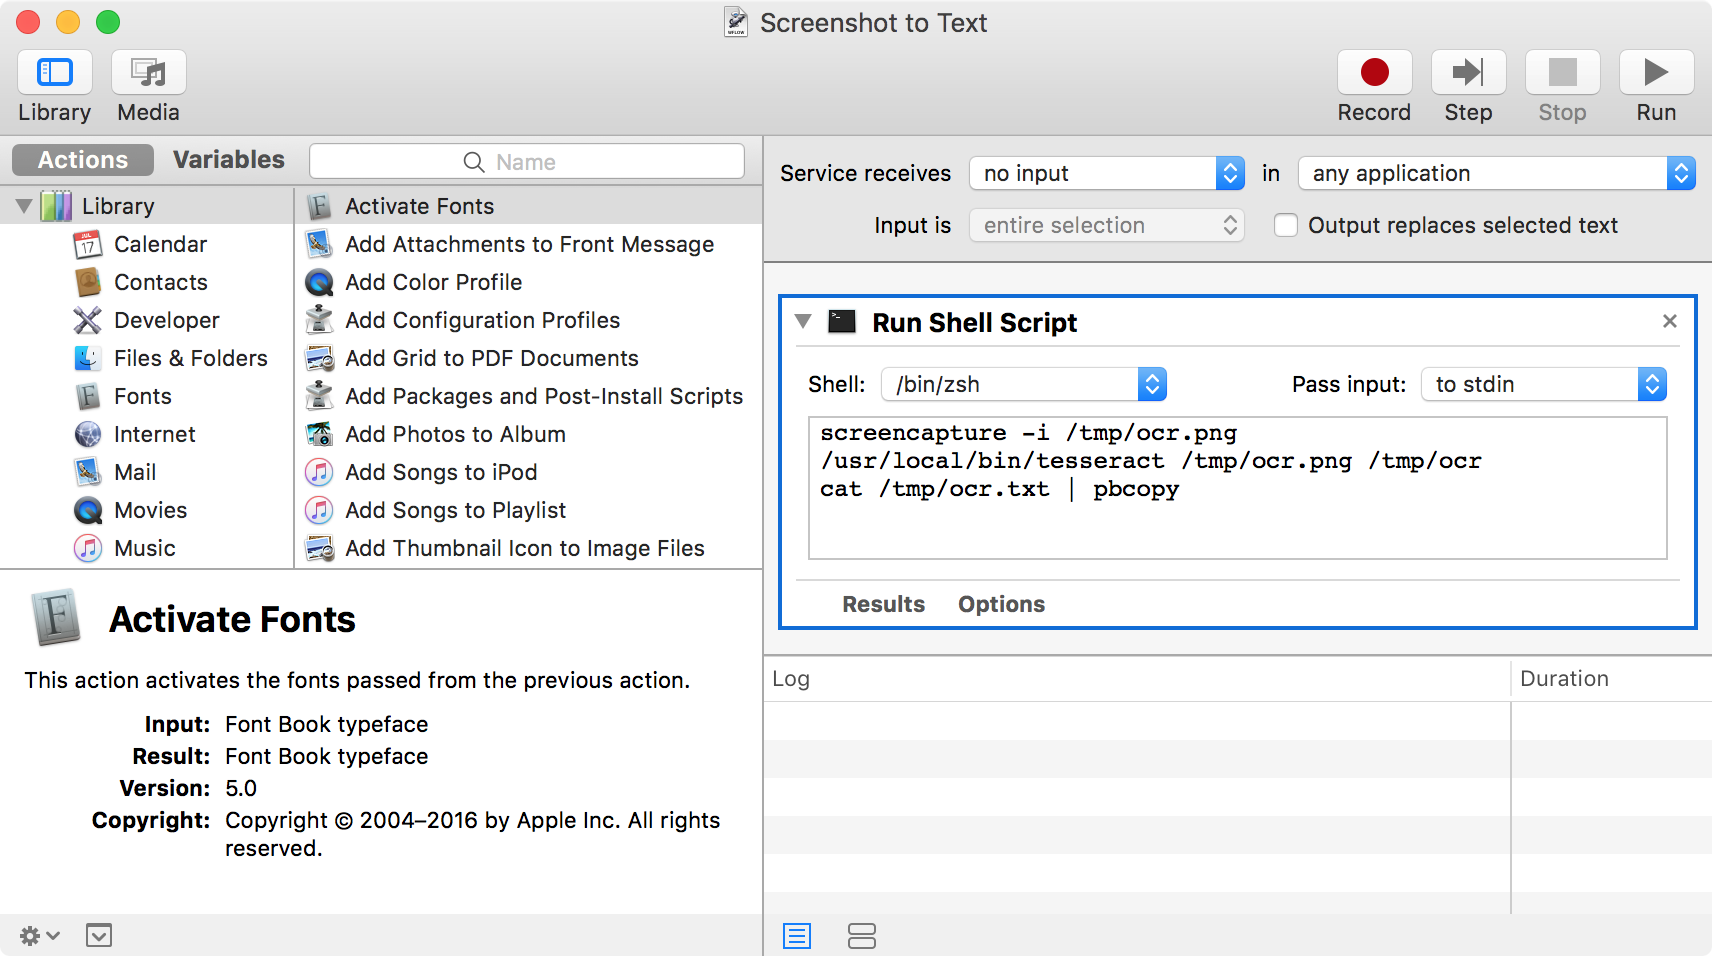
The first line loads your bash profile. The screencapture command displays crosshairs on the screen and saves the screenshot in /tmp. The tesseract command gets the previously saved screenshot for parsing and will save the result as a text file in in the same /tmp directory. Finally, the cat command gets the contents of the text file and copies it to your clipboard.
Step 3: Set Up a Keyboard Shortcut
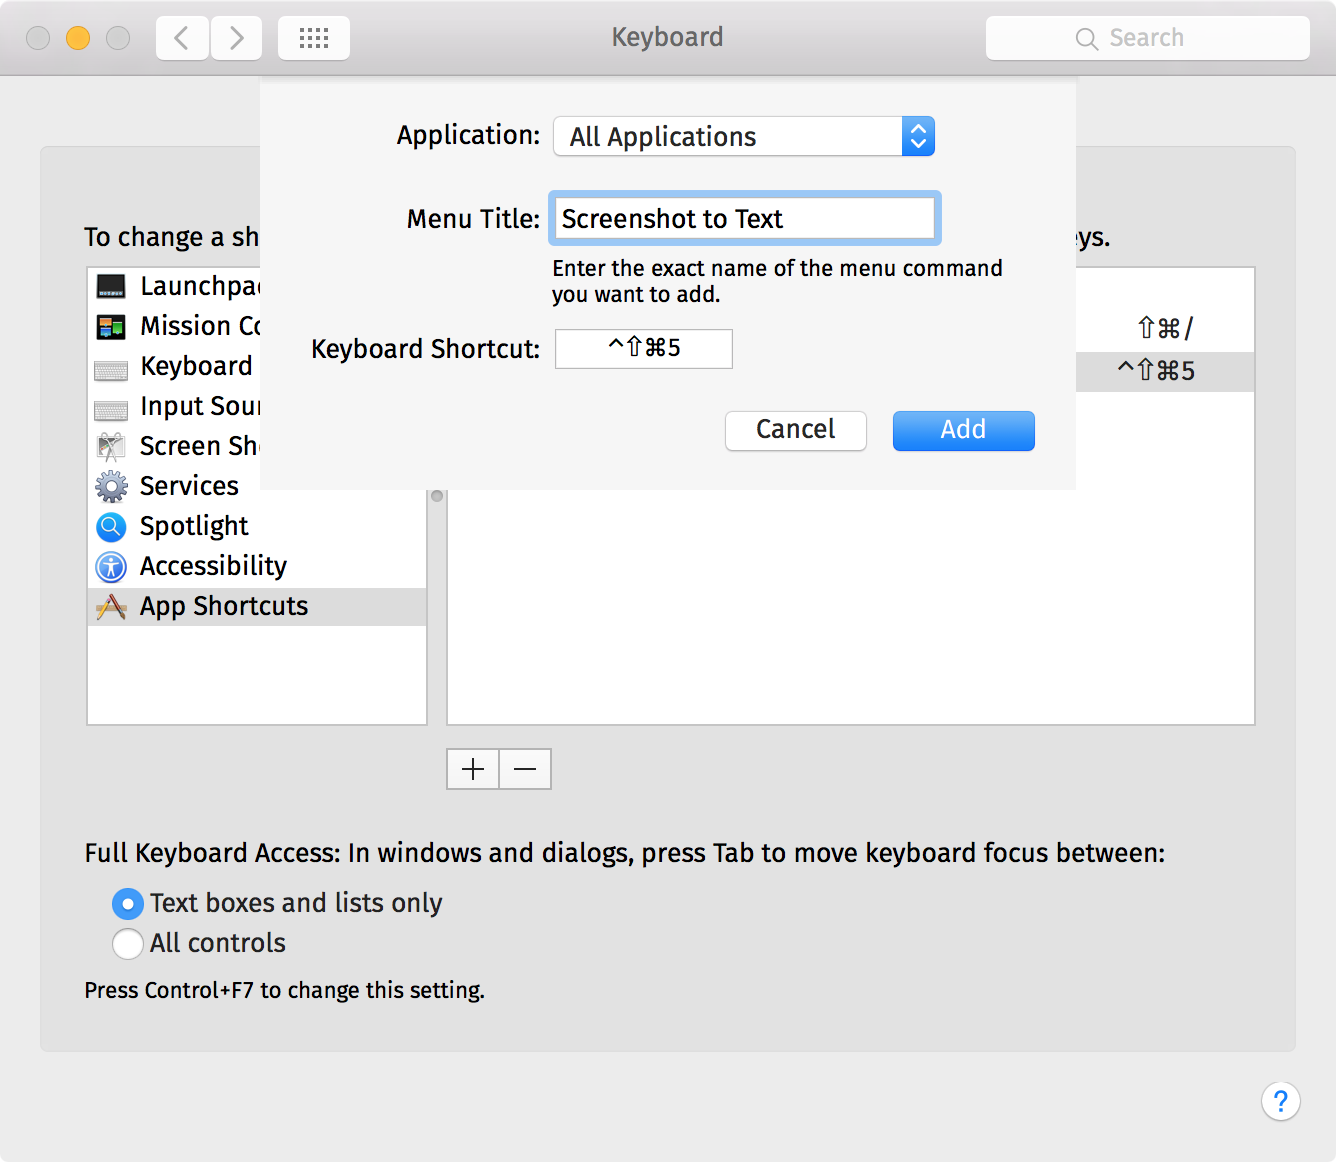
Open System Preferences > Keyboard > Shortcuts and add an entry to the App Shortcuts group. The name of your shortcut should be the same as the service you created earlier. Then assign a keyboard shortcut. I used Command-Shift-Control-5, since OS X already maps screenshot to clipboard functions with Command-Shift-Control 3 and 4.
And there you have it! Getting text out of images has never been easier! Personally, I’m using this setup with web apps like InVision, where our clients can preview and collaborate on design comps and prototypes. It has saved me a good amount of time in recent weeks.